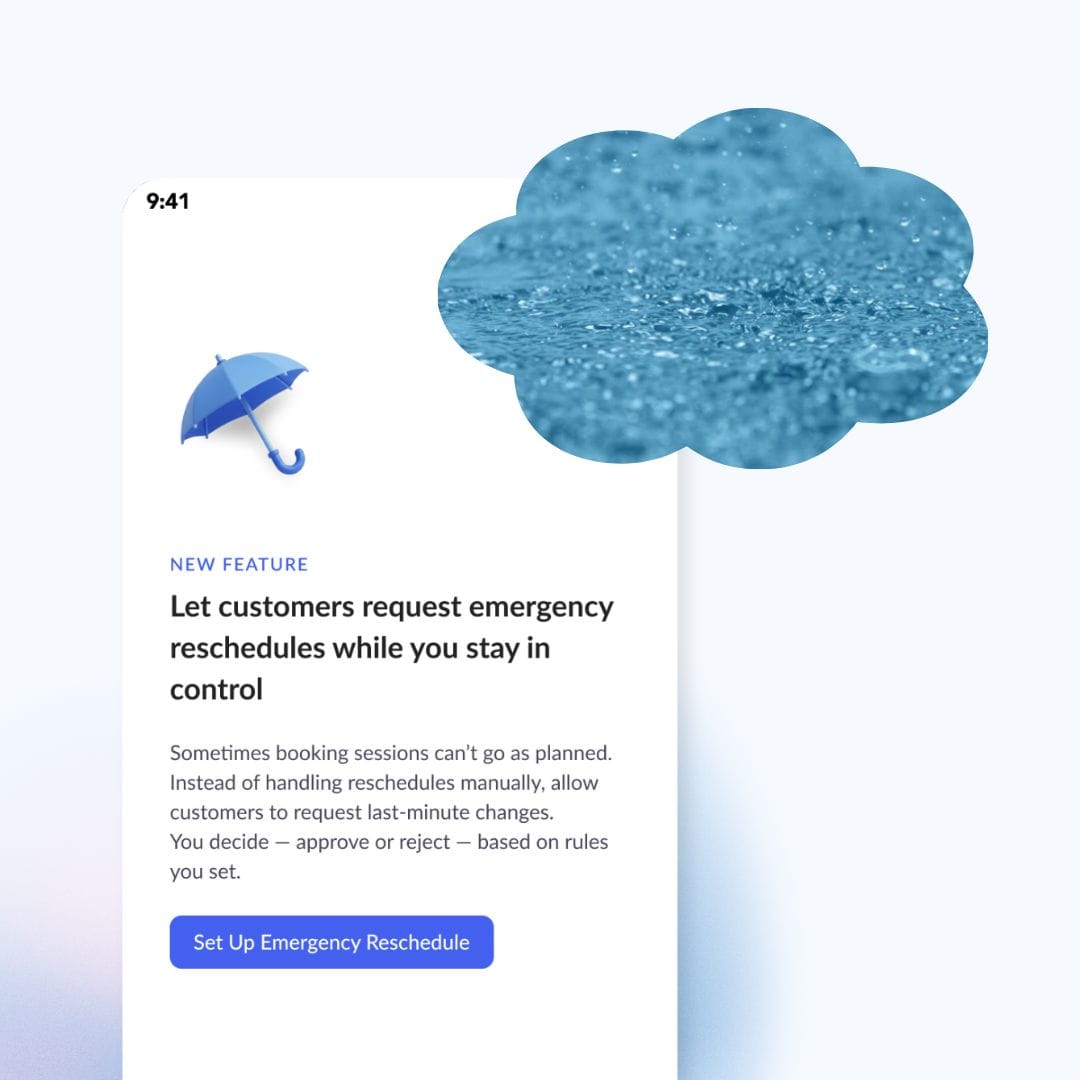
Take Back Control of Last-Minute Reschedule Requests

It starts with rain.
A customer checks the sky 30 minutes before their booking, sees dark clouds, and messages asking what to do. What follows is the usual chain—WhatsApp back-and-forth, checking availability, rescheduling, updating bookings—often stretching into hours, sometimes days.
Emergency Reschedule Request changes that.
Customers now have a structured way to flag last-minute disruptions, and partner centres can respond instantly within the system—on their own terms, without chasing messages or coordinating manually.
While rain is the trigger we all recognise, this applies to anything last-minute: injury, emergencies, or unexpected change of plans.
Less chaos. Faster decisions. Cleaner operations in just 4 simple steps below.
At a glance
- Partner Centre — sets the policy per service, receives a notification on every submission, approves or denies each request
- Customer — submits evidence within your configured window, self-reschedules immediately once approved
- System — enforces the request window, expires unreviewed requests when the session ends, closes the reschedule deadline automatically
How It Works
4 simple steps to zero friction rescheduling
Step 1 - You configure the rules - once per service
Step 2 - The customer submits a request
Step 3 - You review and decide
Step 4 - The approved customer self-reschedules
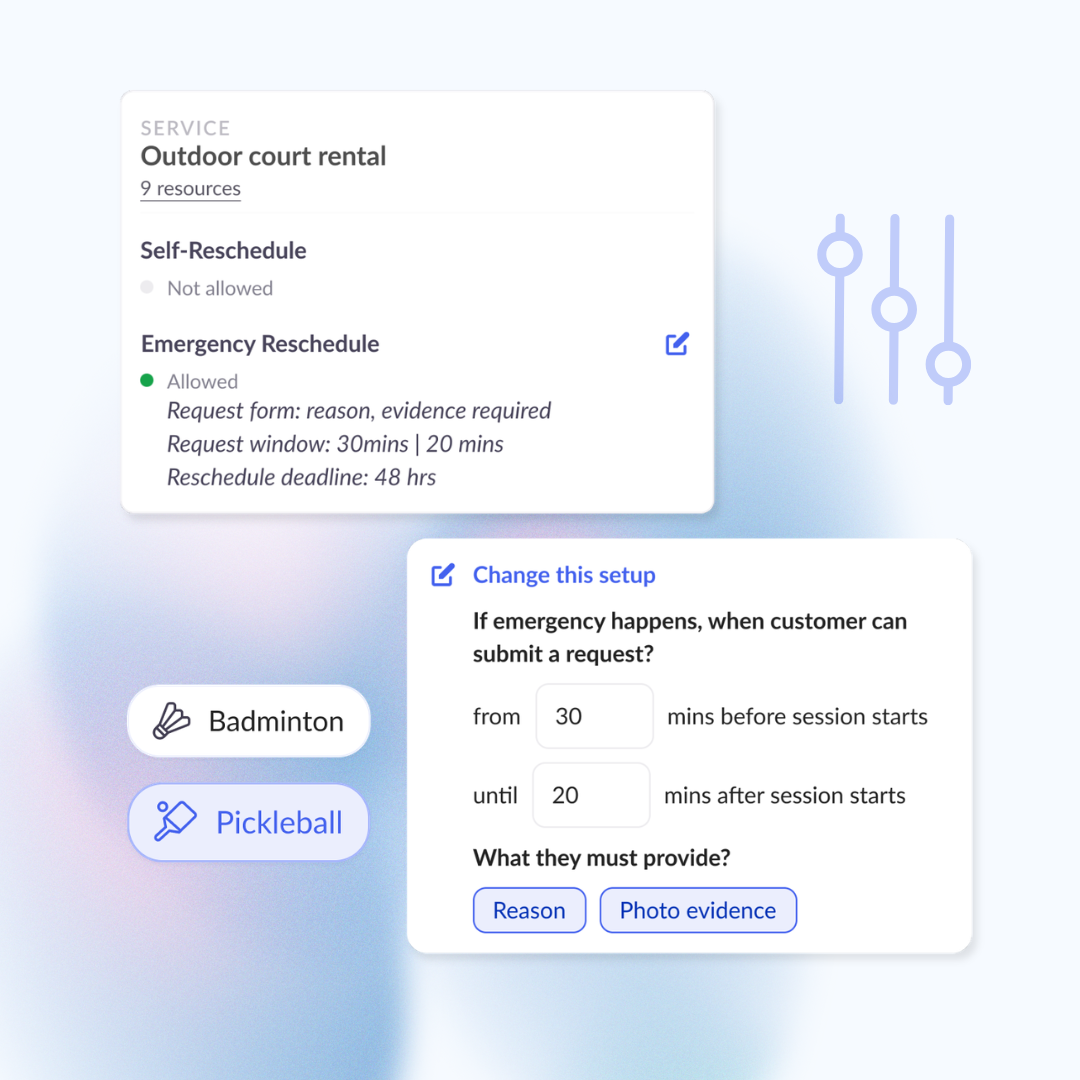
Step 1 — You configure the rules — once per service
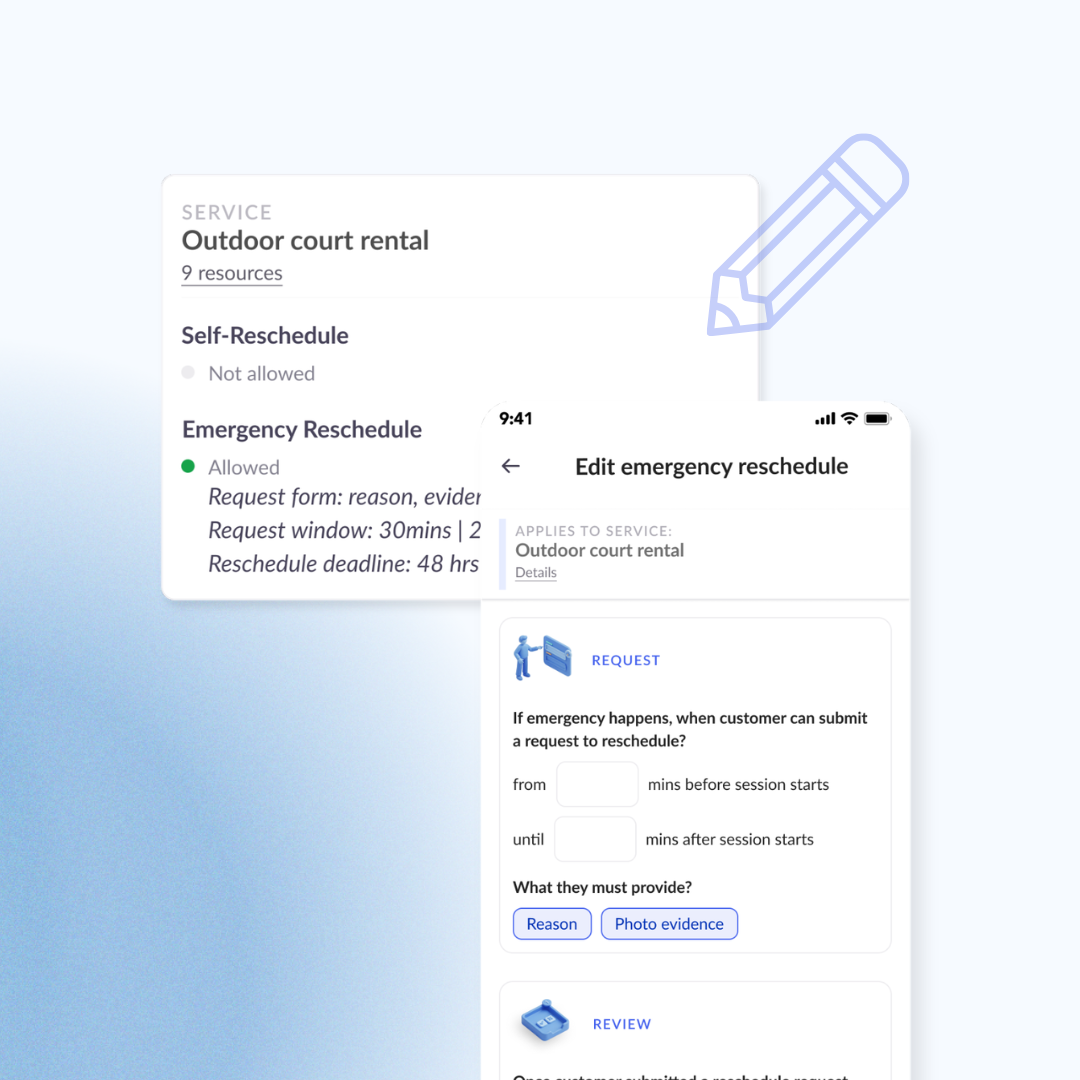
Before any customer can submit a request, you set the policy for each of your services through a guided setup flow. You control three things:
- The request window — when customers can submit. For example: from 30 minutes before the session starts until 20 minutes after it begins. A 4pm–5pm session would open the window at 3:30pm and close it at 4:20pm. Outside this window, the option simply does not appear.
- What customers must provide — a written reason, photo evidence (up to 5 images), or both. You can require either, both, or neither.
- The reschedule deadline — how many hours an approved customer has to select a new slot. For example, 48 hours from the moment of approval. If they don't act in time, the approval expires automatically — no manual follow-up needed.
Different services can carry different policies. Your outdoor courts and indoor courts can be configured independently to reflect how you actually manage them.
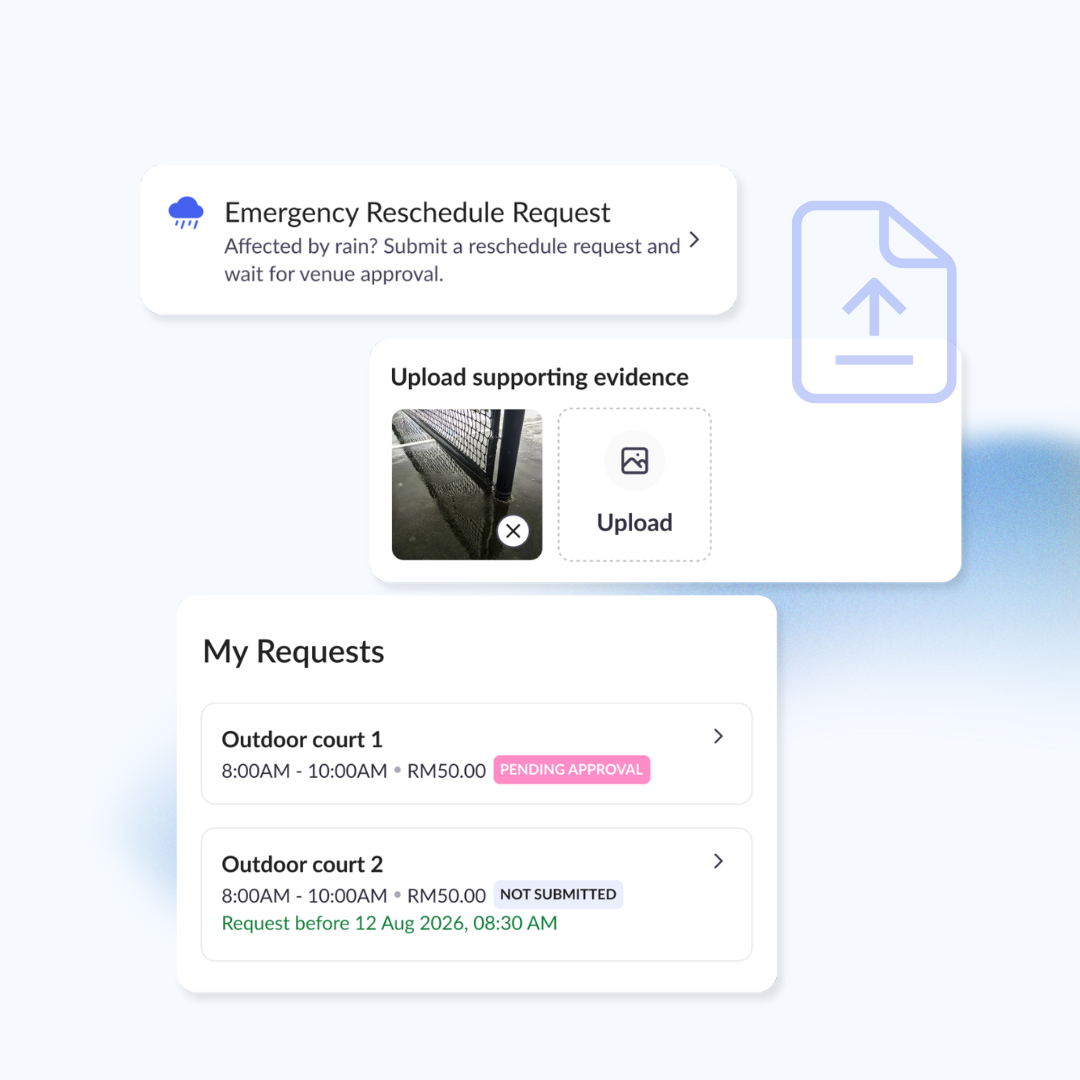
Step 2 — The customer submits a request
When a customer's session falls within your configured window, an Emergency Reschedule Request option appears in their Booking Management section in the Courtsite app. Outside the window, it is either not shown or displayed as unavailable.
Tapping the option opens a dedicated request page where they upload their evidence and provide their reason. Once submitted, their requested slot will show "Pending Approval" status. They cannot submit another request for the same booking while one is pending.
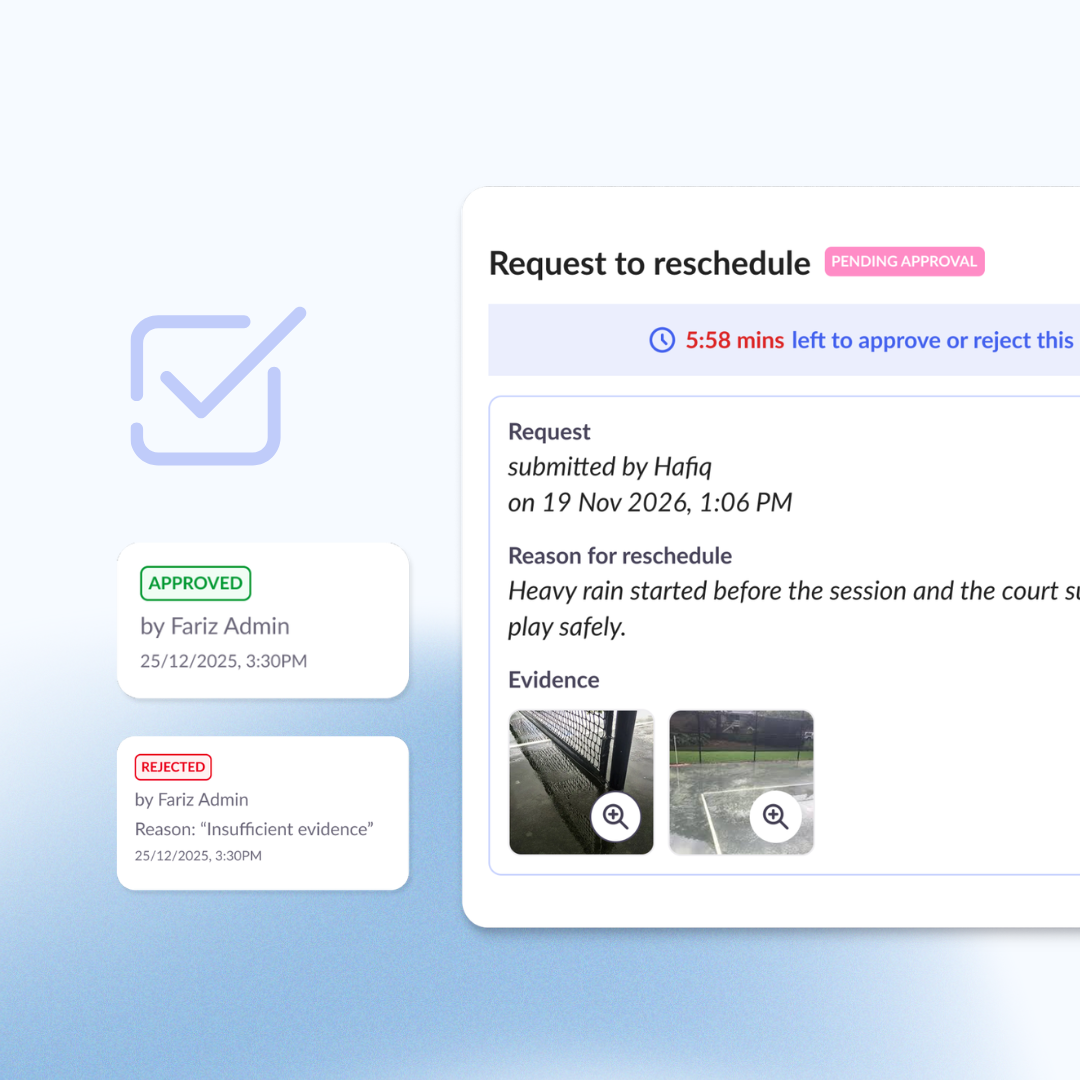
Step 3 — You review and decide
The moment a request is submitted, you receive an email notification. All requests appear in the Reschedule Requests section of Courtsite Business — a dedicated queue showing the booking details, session time, court, submission time, customer's reason, and any photo evidence.
From the queue, you can approve or deny individually, or use bulk actions to handle multiple requests at once during busy periods. If you deny, you choose a reason — weather not confirmed, session already started, insufficient evidence, or a custom message — which is sent to the customer by email.
You can also view pending action requests directly on the booking in Scheduler and Bookings
Any request not reviewed before the session ends expires automatically. The Past tab keeps a 7-day record of reviewed requests as well as expired requests, including the outcome, the reviewer's name, and the reason given for any denial.
One important note: during high-volume periods such as widespread rain events, some requests may not be reviewed before the session ends and will expire automatically.
Step 4 — The approved customer self-reschedules
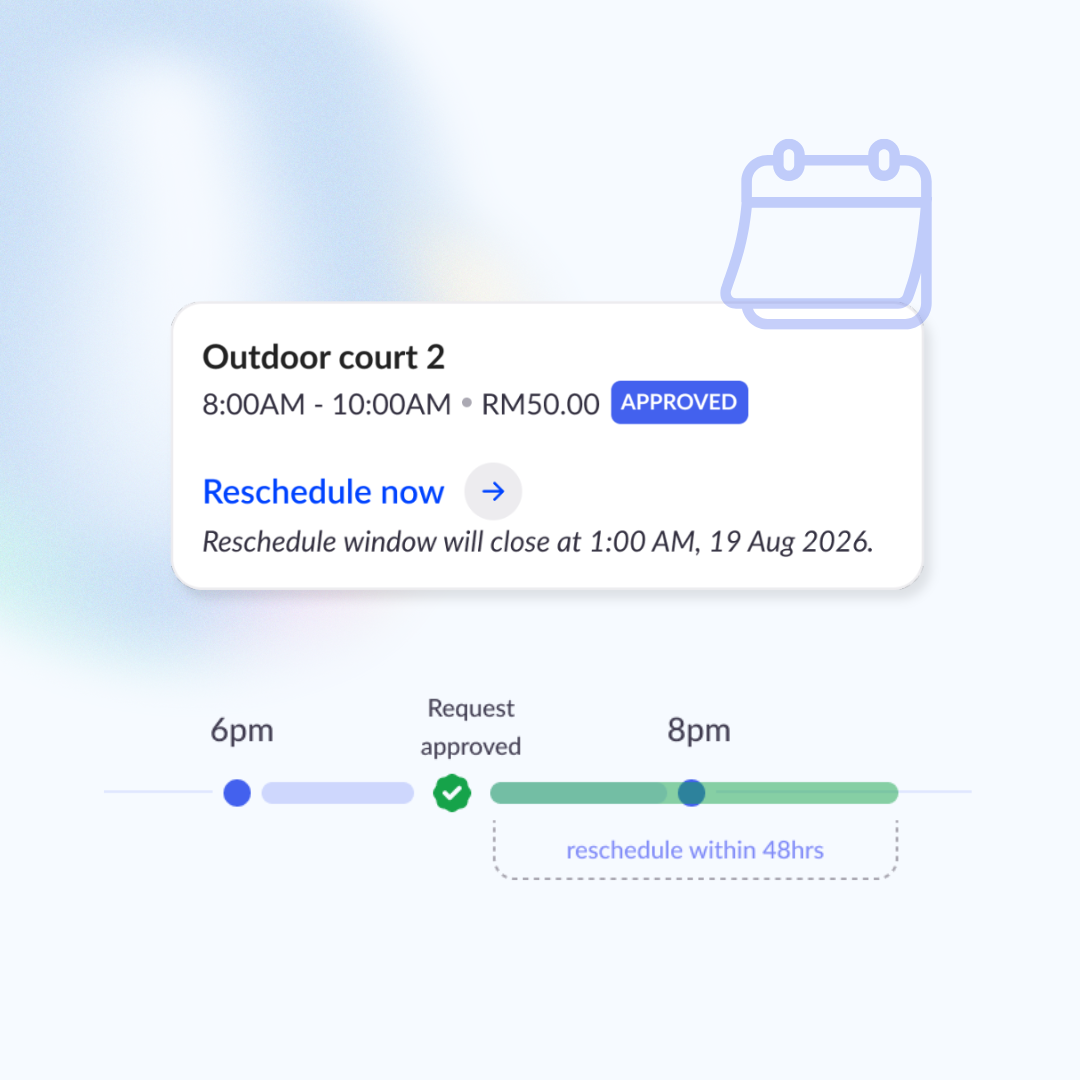
When you approve, the customer receives an email: "Your request is approved. Reschedule now." Back in the Courtsite app, their slot shows an "Approved" status with a countdown showing exactly how long they have to select a new slot.
They can browse live availability, pick a new slot, and complete the reschedule on their own. The original booking is cancelled and the new one confirmed — no further involvement from you or from Courtsite.
If the deadline passes, the approval expires cleanly and the window closes.
Managing Your Settings
After initial setup, the Reschedule Settings page gives you an ongoing view of every service's configuration, grouped by category. Each service card shows both the standard self-reschedule policy and the emergency reschedule policy side by side.
From the card, you can edit the full configuration, copy an existing configuration from another service to save time, or disable emergency reschedule for a specific service.
Note: Access to the Reschedule Settings page requires the Partner Centre Admin Settings permission. This should be granted to 1–2 members per organisation. If you do not currently have access, reach out to your account contact at Courtsite.
Common questions
What happens to the original booking when the customer reschedules?
It is cancelled automatically once the new booking is confirmed. Customers select their new slot from live availability.
Can a customer submit more than one request for the same booking?
No. Only one request can be active per booking at a time. While a request is pending, the submission option is not available.
What if the centre does nothing before the session ends?
The request expires automatically. The customer is notified and no reschedule takes place. No manual action is needed from the venue.
What if the customer is approved but can't find a suitable slot within the deadline?
The approval expires and the reschedule window closes. Venues can still assist manually in these cases if needed.
Where exactly do I find the queue in Courtsite Business?
Log in → Bookings → Reschedule Requests. Pending requests are in the Pending tab. The Past tab shows the last 7 days of reviewed and expired requests.
Why This Matters Beyond Rain
Rain made this problem visible. But the same friction exists any time a customer cannot make their booking at short notice — an injury, a personal emergency, anything that's genuinely beyond their control.
Previously, there was no good answer. Refunds are not provided, and the standard self-reschedule policy requires advance notice. Customers had no clear path. Venues had no independent way to help.
Emergency Reschedule Request gives both sides a structured process. Customers have a direct way to raise their situation. Partner Centres have full authority to review, decide, and action the outcome — on their own terms, without waiting on anyone else.
Ready to Get Started?
Go to Bookings → Reschedule Requests in Courtsite Business. The guided setup walks you through each option in a few minutes — configuration is fully in your hands.